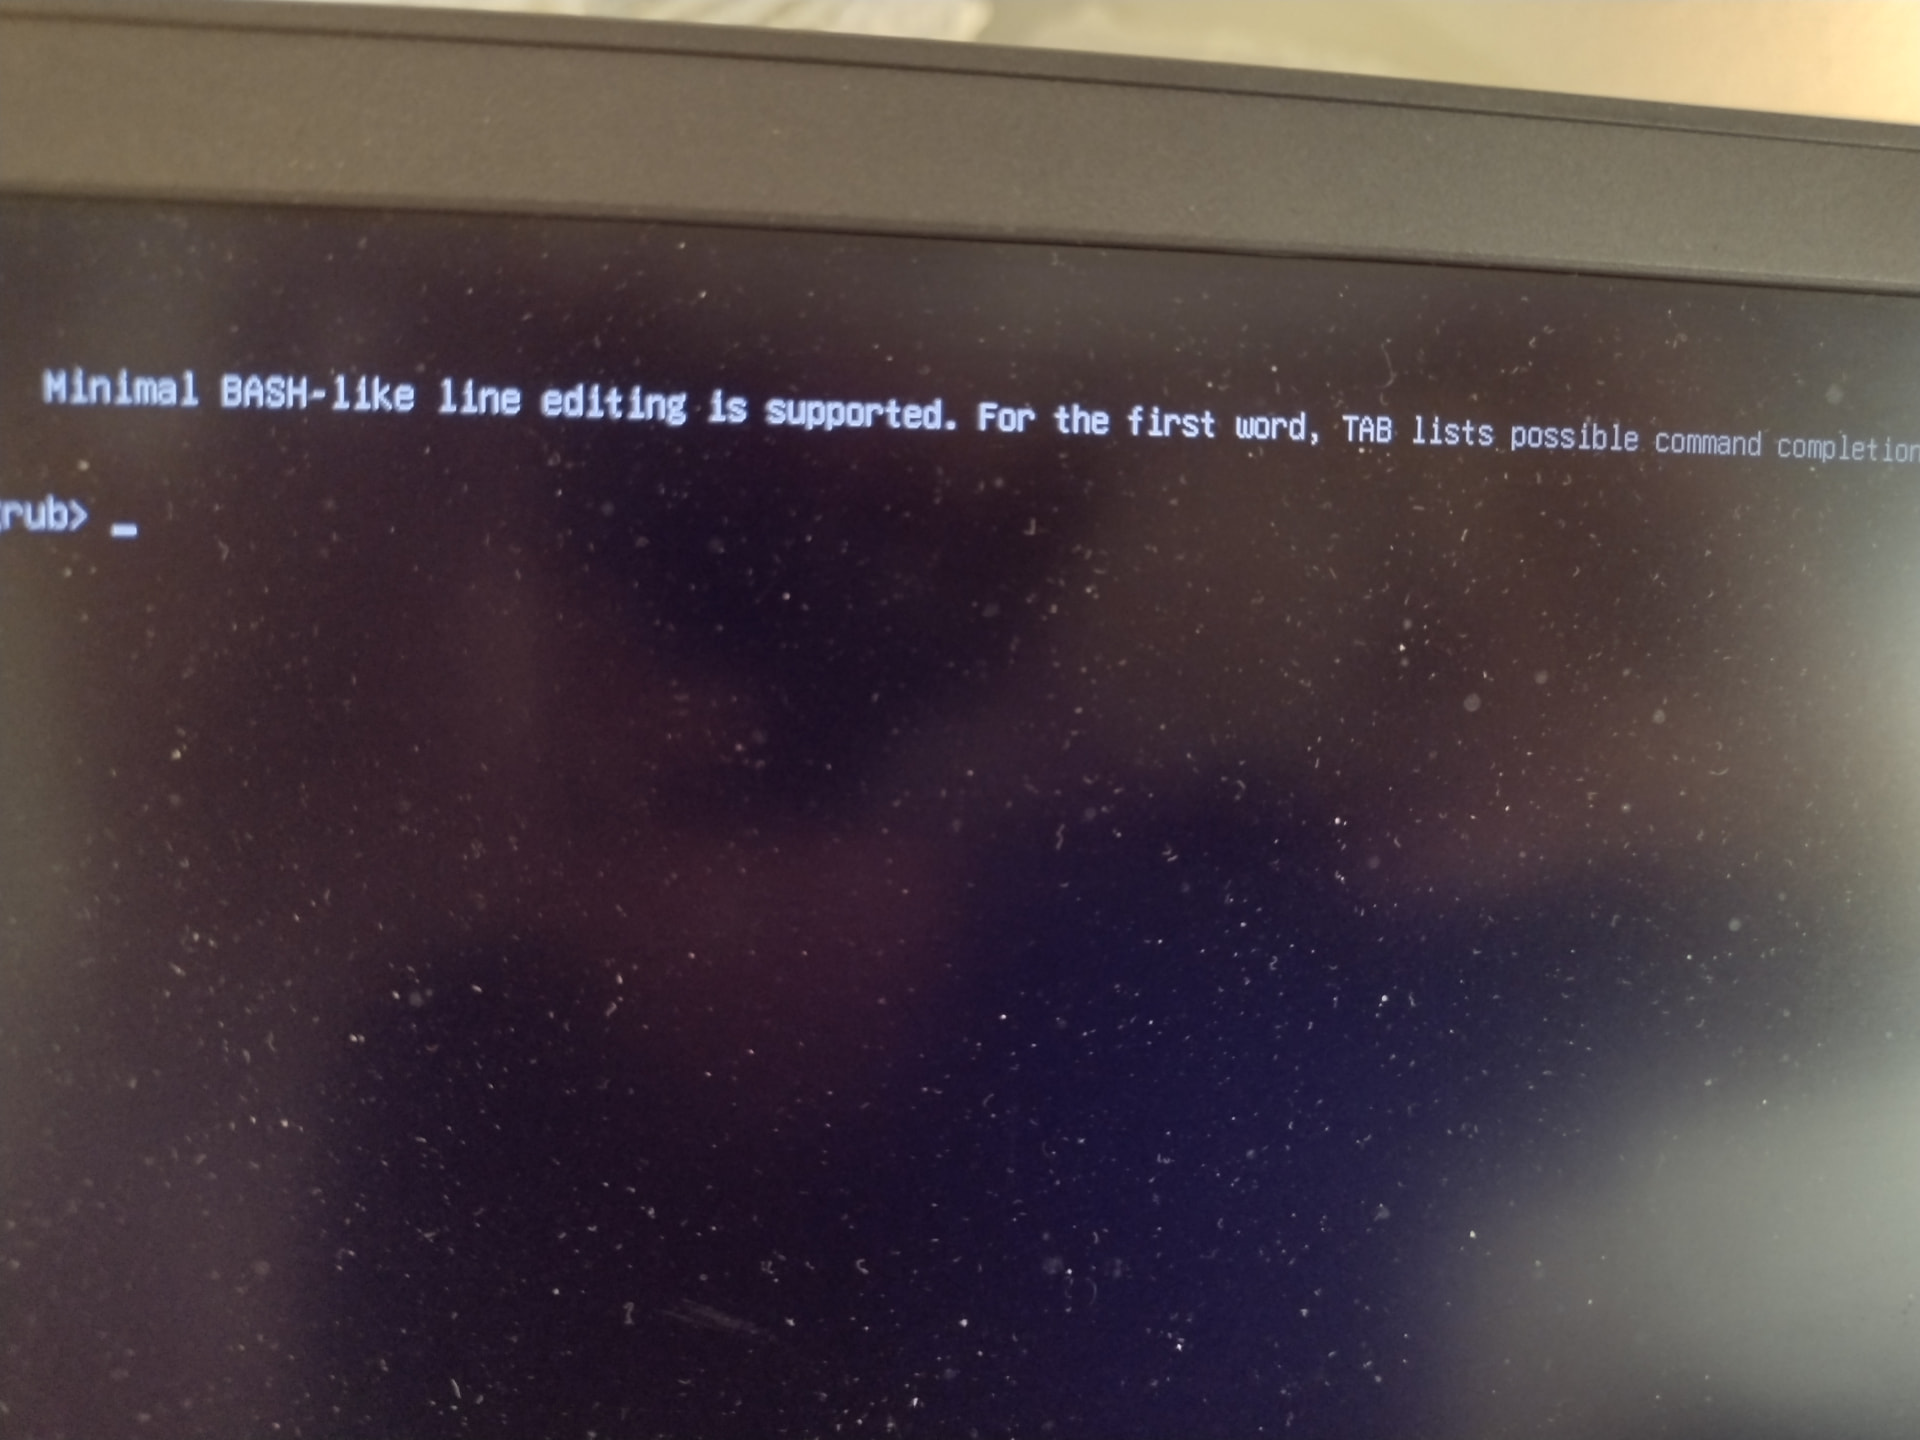
I just started with Linux a week ago and love it. Not dual; I took windows off. But today I accepted all the updates and now my screen is black except for a GNU GRUB message. I’m not a tech person and I don’t know code at all. I don’t know what to do…
Welcome to Linux and to our forum! Good news first ![]()
You haven’t broken anything and this is fixable. That grub> prompt means the boot menu got confused after the updates, which can happens sometimes. Your files and your system are still there.
Since you’re brand new, the easiest path is usually to boot from a USB stick and run a repair tool, rather than typing commands at that prompt.
But before anything, important question: what distro did you install? Ubuntu, Mint, Pop!_OS, Fedora, something else?
Once we know that, we can give you recovery steps. We’ve all been exactly where you are right now at some point.
3 Likes
Thanks! I installed Mint from a USB stick
3 Likes
If you have a Live ISO, boot from that.
Once you have the terminal in that live ISO, open GParted to examine the partitions.
Once you have identified which device has your bootable system (/dev/sd?), enter the following commands at the terminal prompt:
sudo grub-install ${device_full_path}    # i.e. /dev/sda

sudo update-grub
Then reboot. That should fix it.
7 Likes
I don’t know what live ISO means but I tried typing those commands and it says “can’t find command sudo”
2 Likes
@Ldbennet Eric’s route works great if you’re comfortable picking the right device. If that feels like a lot for your first week, there’s an easier option: a tool called Boot Repair that does that same step for you automatically so you don’t have to figure out which /dev/sd is yours.
Boot the live stick first like @ericmarceau said, but once you’re at the desktop, open the terminal and paste these one at a time:
sudo add-apt-repository ppa:yannubuntu/boot-repair
sudo apt update
sudo apt install -y boot-repair && boot-repair
That opens a little window, click “Recommended repair,” let it run a minute, then reboot without the USB.
Whichever route you pick, we’ll we here till you’re back on your desktop.
4 Likes
Okay. I did everything. How do I reboot without the USB stick?
2 Likes
Take the USB stick out of the computer, then reboot from the menu. Its usually top-right power icon, or, you can type sudo reboot in the terminal.
2 Likes
If you’ve performed repairs, then simply remove the USB stick and perform a hard-reset of your computer (press, hold, then release the power button).
A “Live ISO” is the CD or USB stick onto which you “burned” the downloaded a given Distro’s installable image in the form of an ISO file, i.e. “distroname.iso”.
5 Likes
Thank you both so much!! ![]() All good now.
All good now.
8 Likes
Nice job! We are happy to help.
For what it’s worth, this isn’t something that normally happens when you accept updates, it’s pretty rare. You did nothing wrong, just bad luck with that one batch. Mint’s usually rock solid, so don’t let this scare you off updating. Just keep that USB stick handy and you’re set!
You can bookmark this thread below, in case this happens again.
Edit: went ahead and marked this as solved.
5 Likes
Lesson here that we all learn the hard way:
- turn OFF automatic software updates/upgrades
That way, you are not caught off guard.
Next, always perform a full backup of your system before applying any updates. That way you always have a fallback of what you have to recover from.
Also, you might want to consider noting all packages that might be updated, but back out of that multi-package “plan” and only perform the updates, but only one package at at time, then rebooting after each one.
That may seem extreme, but by doing so, you can isolate and pinpoint the exact package that is the source of any issues. Then, after recovery from any issue, you can bypass or hold-off on installing that particular package until a likely subsequent version fixes the issue encountered.
Hope those strategies help!
5 Likes
Great information. Unfortunately, I’m so not tech savvy that I have no idea what updates are for what. But I take that under advisement and will research them before applying anything in the future!
4 Likes
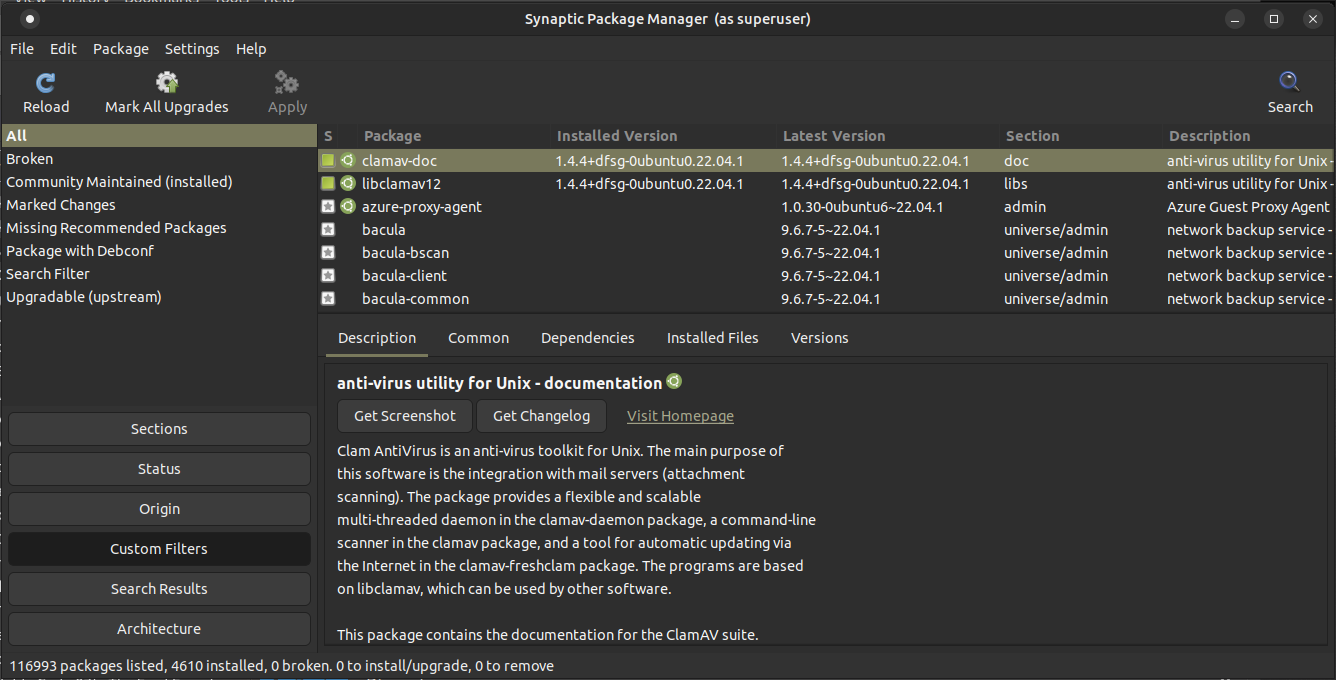
In my opinion, the best Package Manager for Newbies or Non-SysAdmins is
View of Synaptic when open:
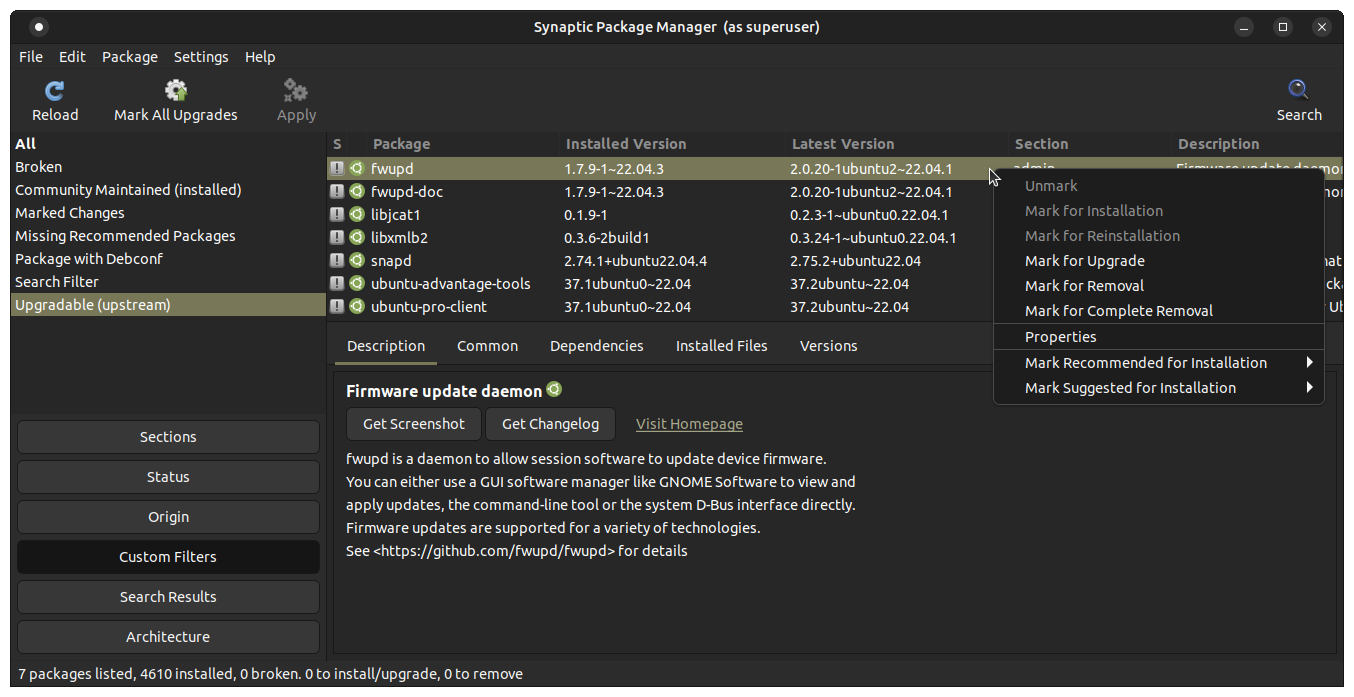
View when click on upgradable, to show only those that nedd upgrading, along with the versions “currently installed” and “available to install”:
However, as you will find, some sources for packages “stagnate”, which is the case with “Savannah” for some packages.
Ubuntu has managed its own version of Synaptic for its repositories, which is what the Launchpad system is for ( … but that too, I believe, is in the process of being phased out ![]() ).
).
There is a GitHub repository “mirror” of Synaptic offered at
The individual offering that is the same person who “managed” the package on the Ubuntu Launchpad, so for me that translates into “trustworthy source”.
The only issue is that GitHub sometimes offers ready-to-use “Debian” packages, which is what Ubuntu uses, and sometimes they don’t, implying that you have to download the source code and compile on your own system for your own “context”. This latter scenario is the case for the Synaptic from GitHub.
If you do want to pursue that last option, instead of relying on only the version available from your default repository (usually the best and safest choice), then you can ask those in the Community who are knowledgeable about that to guide you in making the attempt. But that sometimes involves more steps than we are prepared to take. ![]()
2 Likes
You know? That’s my go-to command, because I like installing old OS. My Arch Linux is not detected in the installed OS Grub, because it does not support certain flags in the Arch Linux filesystem, So, I like to do repetitive habits and patterns to overcome that.
cd ~/Downloads
sudo umount /dev/sdb*
sudo dd if=archlinux-2026.06.01-x86_64.iso of=/dev/sdb bs=4M status=progress conv=fsync
sync
sudo eject /dev/sdb
sudo reboot
Then boot to USB
In Arch Linux Live Environment, I always run this Command
mount /dev/sda3 /mnt
arch-chroot /mnt
grub-install /dev/sda
grub mkconfig -o /boot/grub/grub.cfg
exit
umount -R /mnt
reboot
My habit command if I install an old OS that doesn’t detect Arch
Nice help Eric!
3 Likes
I agree, Synaptic takes a bit of getting used to, but take the time to learn it and use it. If is an invaluable tool.
3 Likes