Clonezilla for cloning drives

Last night I used Clonezilla to install a larger Hynix 1TB NVMe in my ThinkPad T14s.

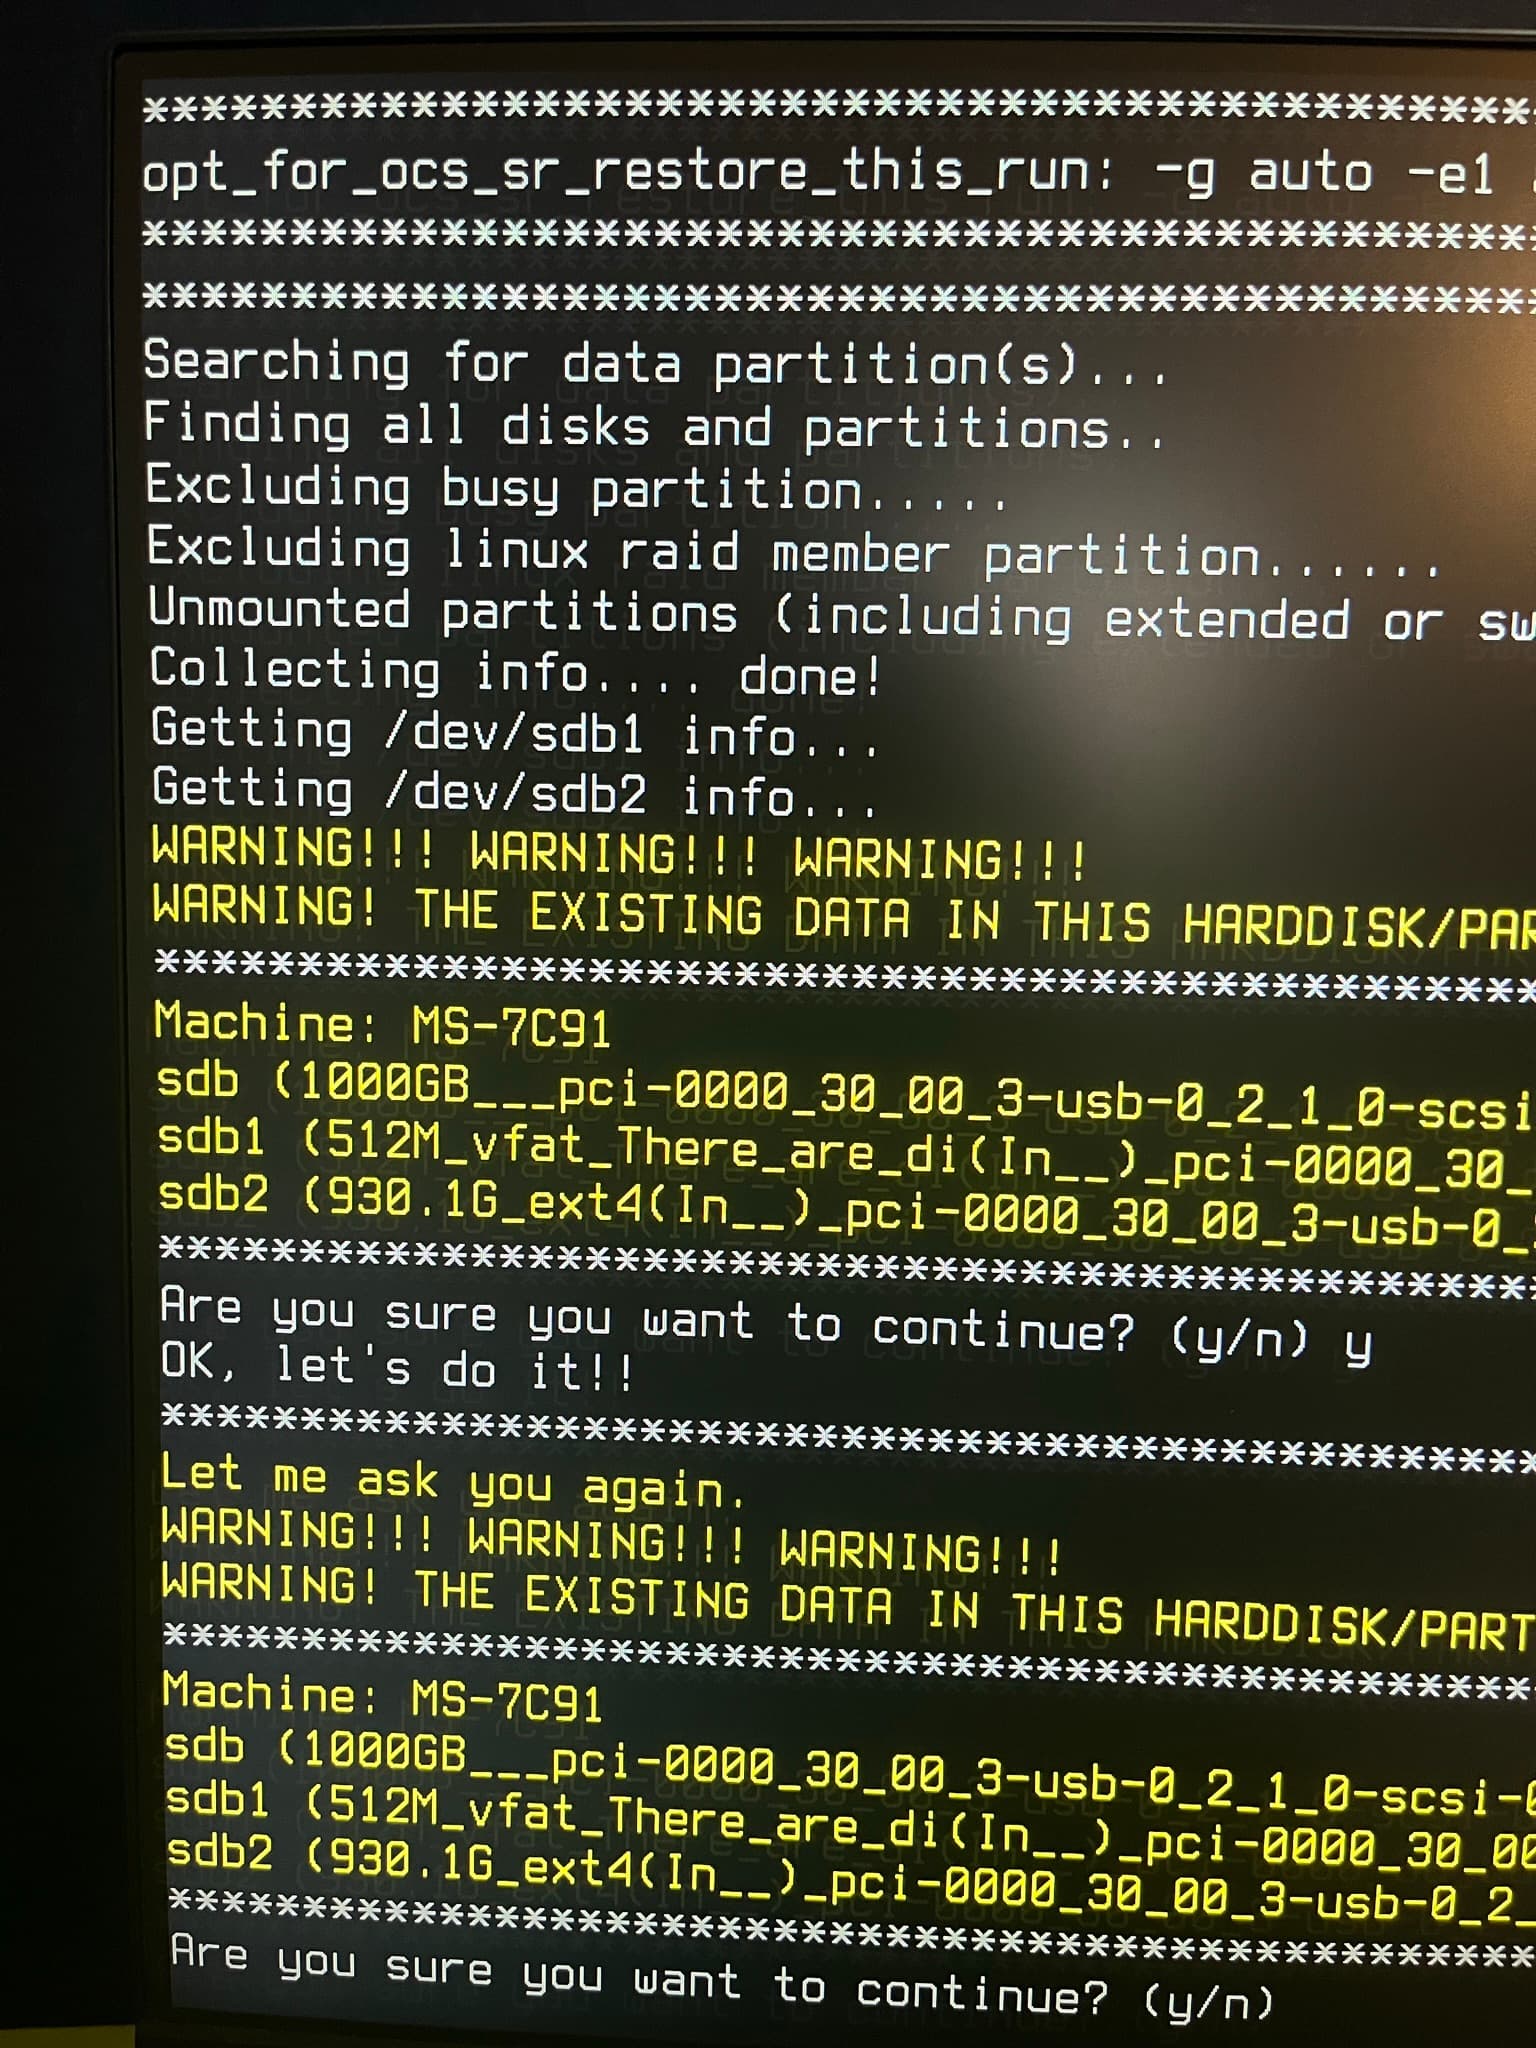
The warning screen below I found funny but also a testament to the very nice UI that Clonezilla boots into:

Here’s a quick guide on using Clonezilla to copy a Linux distribution from one drive to another:

1. Prepare Your Drives:

Before you begin, make sure you have both the source and target drives connected to your computer. The target drive should be at least as large as the source drive to accommodate the entire Linux distribution.

2. Download Clonezilla:

If you haven’t already, download the Clonezilla ISO image from the official website (https://clonezilla.org/). You can choose between Clonezilla Live (for single-machine use) or Clonezilla Server Edition (for multiple machines).

3. Create a Bootable Clonezilla USB Drive:

You can create a bootable Clonezilla USB drive using tools like Rufus (on Windows) or dd (on Linux). Boot your computer from this USB drive.

4. Start Clonezilla:

After booting from the Clonezilla USB drive, you’ll be presented with options. Select “Clonezilla Live (Default settings*)” if you’re not sure which option to choose.

5. Choose Your Language and Keyboard Layout:

Select your preferred language and keyboard layout when prompted.

6. Select Clonezilla Operation Mode:

You’ll be asked to choose between “Beginner” and “Expert” modes. For most users, “Beginner” mode is sufficient, I tried Expert but I didn’t have to change anything, used defaults. Lots of advanced options available.

7. Select “Device-Device” Clone Mode:

Choose the “device-device” option for cloning from one drive to another.

8. Choose Clonezilla Work Mode:

Select “disk_to_local_disk” to clone from one disk to another.

9. Choose the Source Drive:

Select the source drive where your Linux distribution is currently installed. Clonezilla will ask you to confirm the source drive.

10. Choose the Target Drive:

Select the target drive where you want to copy the Linux distribution. Be careful as all data on the target drive will be overwritten.

11. Confirm the Operation:

Clonezilla will show a summary of your choices. Review them carefully, as cloning will overwrite data on the target drive. Confirm when ready.

12. Start Cloning:

Clonezilla will start the cloning process. It may take some time depending on the size of your Linux distribution.

13. Complete the Clone:

Once the cloning process is finished, Clonezilla will notify you. Remove the Clonezilla USB drive and target drive, then reboot your computer.

14. Verify the Clone:

Boot from the newly cloned drive and make sure everything works as expected. You may need to update your bootloader settings if you’ve copied your root partition.

That’s it! You’ve successfully used Clonezilla to copy your Linux distribution from one drive to another.

2 Likes

Also check out easeus.com if not familiar with booting into BIOS.

1 Like

Clonezilla proves very useful in a situation that the Linux system fails to boot for any possible failure in hardware or software. I also have used Acronis True Image. It is quite close to Clonezilla in efficiency for backing up drives.

1 Like

There’s also Rescuezilla = GUI-based Clonezilla alternative, not a front-end to Clonezilla itself, but both use partclone.

1 Like

CloneZilla has a user-unfriendly text-based user interface, not suitable for novice users. RescueZilla on the other hand, has a nice simple GUI, for i386 and amd64 CPU architectures, works great, and is CloneZilla compatible.

[Download RescueZilla]

2 Likes

Welcome to the forums @od4knb Yes, Rescuezilla is a really great option.

A year later, I needed to refer to this guide.

I’ve been running pfSense 2.7.2 for the past couple of weeks. I’m new to pfSense, so that was the first version I’ve used. However, about a week ago, Netgate released version 2.8.

I don’t want to mess things all up, so based on the advice I received in the pfSense forums here, I’ve decided to plugin in an external NVMe drive and clone my current 2.7.2 pfSense NVMe over to it.

Then when complete, I can perform a dry run of the upgrade on the cloned drive.

In any case, in following the above instructions, I realize some steps are no longer in the order that matches the current Clonezilla version. I’ve updated the instructions above accordingly.

2 Likes

Nice article, I do have one question, I want to clone (separately of course) my Windows drive and my Linux drive to a 20 ish TB removable drive. Is it possible to clone each drive to that without overwriting the entire drive? Also when I move the Windows install to my ssd drive from my SATA drive would I have to do anything to GRUB? I know I would have to change BIOS to use the SDD drive as a boot option. Or is Clonezilla the best(?) option for that? Oh I also found this article on how to create a boot able usb using the dd command it’s extremely easy to follow.

1 Like

I use “dd” to image source drives to either destination files or destination drives.

I have never tried Clonezilla, but it appears to be perfect for use on a headless computer using serial console (Netgate appliances with ZFS). Apparently, Clonezilla can also send to a destination file.

Clonezilla Live can image a single computer’s storage media or a single partition on the media to an image file stored on a SSH server, Samba network share, locally-attached hard disk drive or to a network filesystem file-share.

2 Likes

So your stating I could use the dd command to just clone the hard drives to a iso on the removable drive? Can dd copy a drive that isn’t on? Like my current Windows hard drive for example?
And the clonezilla in the Debian repos is the SE (server edition) just as a fyi :wink:
Thanks in advance

1 Like

Technically, the output of “dd” to a file would be called “raw”, not an .ISO, but you are on the right track.

For the source drive, the operating system must be shut down.

To clarify, the “dd” destination file would be usable as a backup only. You will not be able to boot directly to the “dd” destination file. My understanding of what you have been asking was that you wanted a temporary storage location (backup) of your two operating systems so that you could switch the two operating system drives…SSD to mechanical (spinning-rust) hard drive and vice versa.

1 Like

mechanical (spinning-rust) hard drive

:rofl:
Well sort of. I’m trying to create a way to make my SSD the Windows install instead of the SATA Hard drive. So the SSD needs to be bootable. But I want to clone my two Operating Systems to a removable hard drive as a disaster recovery method. In a perfect world (which we all know doesn’t exist), I’d be able to have them as ISO images so I can just install from those images in case of failure of some type.

2 Likes

Using dd to copy iso is discussed briefly here as well:

Just remember it’s also nicknamed “data destroyer” for good reason. I’ve used it a lot more years ago but some of these tools like the Raspberry Pi imager and Etcher I’ve been using instead more recently.

Even used it for benchmarking CPU and disk r/w, especially when I just needed a quick… “which VM or web host is faster.”

But now I mostly use cli tools for that as well.

dd is really a useful utility for sure, so flexible and versatile.

2 Likes

If I understand correctly:

Current State:

  1. HDD - Windows
  2. SSD - Linux

Future State:

  1. HDD - Linux
  2. SSD - Windows

Additionally, there is a 20 TB USB external HDD that is available for backups.

Additionally, this is a single computer where you are dual-booting.

Is that correct?

Is the Windows HDD encrypted?

Is the Linux SSD encrypted?

If so, before we go any further, I should point out again that “dd” is limited to destination disks that are exactly the same size or greater than the source disk.

Clonezilla appears to be more NTFS-aware than “dd”, and it may allow for more complex migrations with disk sizes. I do not know.

Assuming different disk sizes can be overcome, there remains the GRUB questions for Windows which I cannot answer.

2 Likes

Not quite, but close. Both Linux & Windows are currently on SATA Hard drives, I want to have Windows on a SSD so maybe it won’t take so long for Windows to be usable. Neither drive is encrypted.
Yes I have an external HDD and it’s a single user computer that dual boots. I answered my question about modifying Grub, yes I do. I changed the boot order in BIOS to use the SDD drive and it still shows as the current Windows drive (sda) instead of the SDD (nvme0n1p).
The external HDD is larger than both the Windows drive and the Linux drive (it’s why I bought it) so I could do a “bare metal” back up of both of them. so as long as “dd” doesn’t over write the entire disk and just uses the drive’s size to store the image I’m fine with that, I have the room on the external drive for that.

1 Like

For main hard drive backups I’m using the dd command as well. System rebooted in a live gparted session, I have Linux installed in a 240gb hard drive, and making an image of this disk in an external usb 3.0 drive it takes ~~ 15-20 mins.

Suggestion: I always use the cli parameter status=progress so I can real time monitor status of command.

I find this is the best system.

1 Like